
Create a List
You can create a new List in just a few steps:
-
Go to Lists in the navigation bar and click the (+) button in the top right corner.
-
Give your List a Name.
-
(Optional) Add a Description to provide context for how this List will be used.
-
Click + Add to List to start adding items.
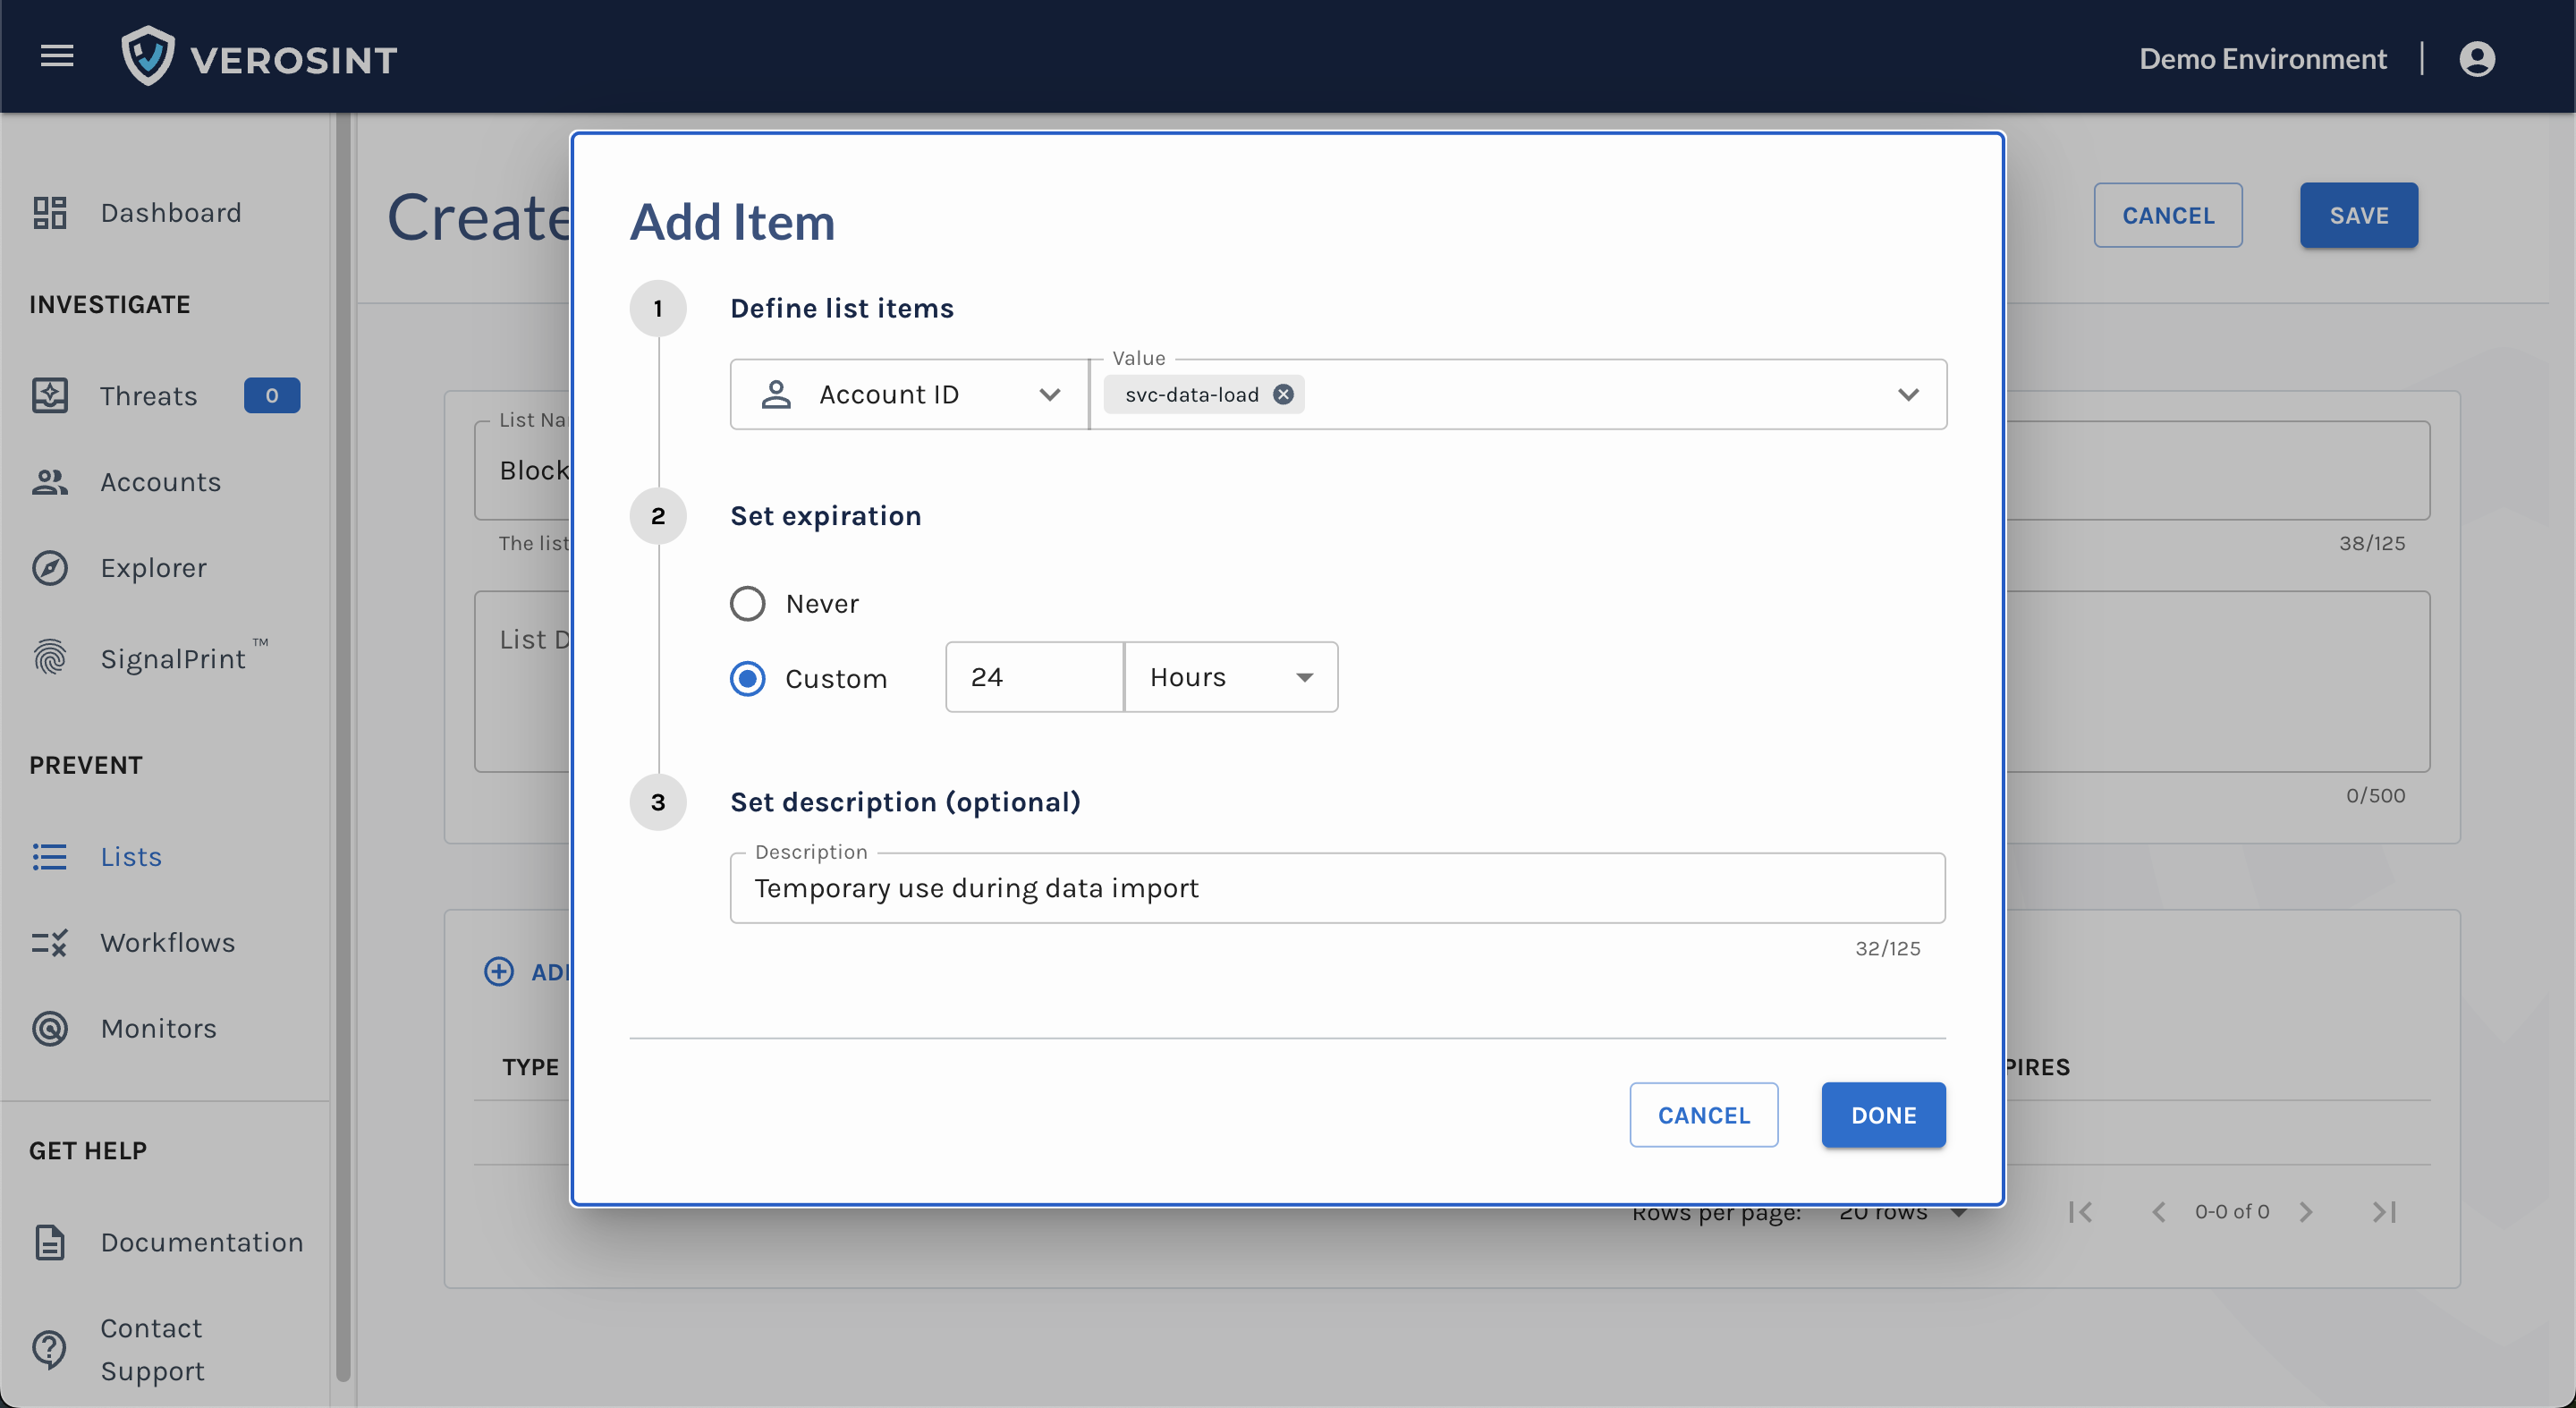
Add items to a list
-
Choose the items to include in your List:
- Identifiers: Account ID, Application, Device ID, Email, IP Address, Payment Hash, Phone, Print ID, Session ID, and User Agent
- String-type Signals (excluding arrays). For example: Privacy Provider = Surfshark VPN.
-
Set an expiration for each item:
- Never (items stay on the List indefinitely)
- Or set a Custom expiration in seconds, minutes, hours, or days.
-
(Optional) Add a Description for the item selected.
-
Click Done when finished.
-
Hit Save on your List (top right corner of the page). Nothing is saved unless you hit SAVE.
Handling Expirations When Adding Duplicate Items to a ListAdding an item that's already on a List updates its expiration only if the new expiration is longer.
Example:
- Existing expiration = 5 minutes, new addition = 3 minutes → expiration stays at 5 minutes
- Existing expiration = 5 minutes; new addition = 15 minutes → expiration is extended to 15 minutes
Once created, Lists become powerful building blocks across Verosint. Add them to your Rule Sets to enforce adaptive policies (like MFA prompts for risky logins) or to your Monitors for real-time detection and automated action.
Think of Lists as your reusable toolkit for prevention, detection, and even trusted access: always up to date, always working behind the scenes.